Growing Peppers...a Delight for the Eye
as Well as the Taste Buds
I’ve been growing peppers (Capsicum annuum) organically for over 25 years.
|
|
(Click IMAGE to Enlarge) |
Peppers are my favorite garden vegetable. I love freshly roasted red bell peppers and roasted New Mexico green chiles.
I love peppers sliced, diced, sautéed, roasted, grilled, and pickled.
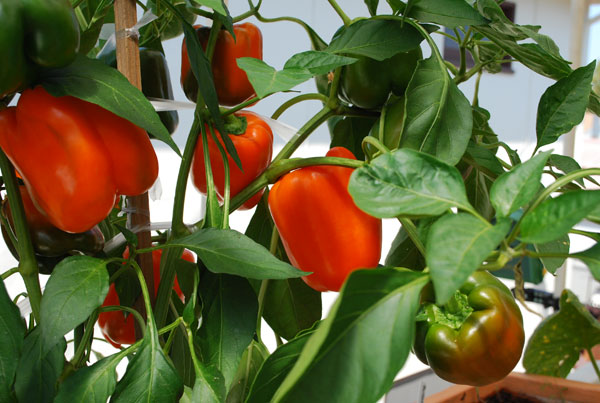
But forget about the delicious fruit for a moment, and consider the plant.
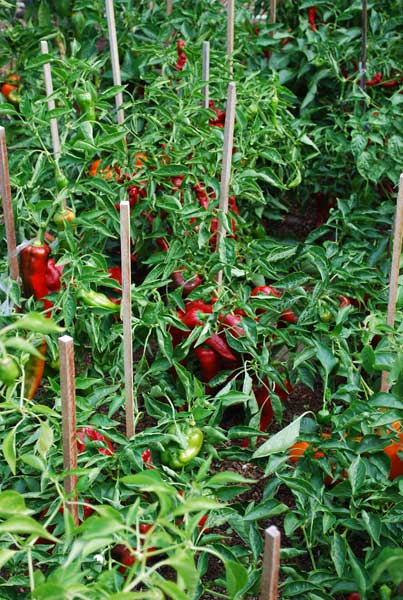
Peppers and chiles have this gorgeous fountain shape, with colorful fruit hanging like ornaments from a Christmas tree. They’re easy to grow, need little care, and they’re a showstopper in any edible landscape.
|
|
(Click IMAGE to Enlarge) |
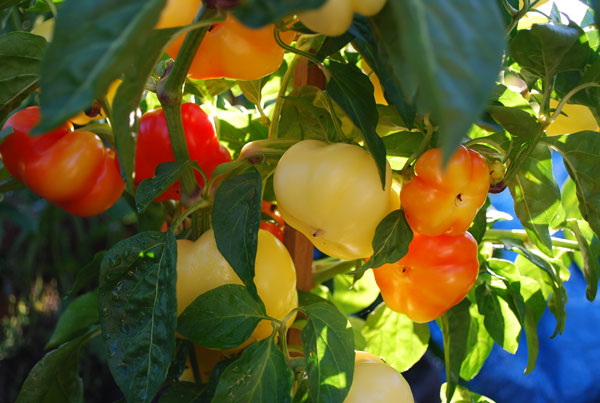
Whether you’re growing bell peppers or growing hot peppers (chiles), the plants are closely related, and have the same soil, water, and cultural needs, as well as common pests and diseases.
If you’re growing vegetables in containers, peppers and chiles are among the easiest vegetables to grow in pots.
Sweet Pepper Varieties
|
Growing Peppers in Containers
Harvesting Peppers
|
Hot Pepper Varieties
How to Grow Peppers
and Hot Peppers
 
|
|
|
Pepper Cold Tolerance/Season
Growing Tomatoes|
Growing Peppers | |
|---|---|
|
| |
|
| |
|
| |
|
| |
|
| |
|
| |
|
| |
|
| |
|
| |
Peppers and hot peppers are strictly summer vegetables, and have no cold tolerance. Frost kills them, and when nighttime temperatures are lower than 55° (13° C), the plants grow very slowly, have yellowish, puckered leaves, and look sickly.
In northern California, we can get away with planting peppers and chiles at the beginning of April.
Our last frost date is at the end of March, so they’ll survive, but they’ll just sit there and look miserable until the weather starts to warm up in May.
|
|
(Click IMAGE to Enlarge) |
Every spring, student gardeners who plant too early ask me ‘What’s wrong with my peppers”?
I tell them to check back with me if the pepper plants still look terrible after a week or two of early summer heat. If they’re impatient, I tell them to cover the bed with a heavy row cover to moderate nighttime low temperatures.
Cold temperatures are almost always the problem. Once it warms up, the plants perk up, the green of their leaves deepens, and they start growing vigorously.
Peppers planted outdoors from seed will only produce fruit in long-summer areas, so it’s best to purchase nursery seedlings right before you plan to set them out, or start seeds indoors under lights about 6-8 weeks before your last frost date.
The procedure for starting peppers from seed is the same as starting tomatoes from seed, but it's even more important to keep the starter pots warm.
A seedling heat mat
will speed germination, and increase germination rates for heat-loving plants like peppers, chiles, eggplants, and tomatoes.
When growing peppers, it’s best to plant seedlings in the ground only after the soil has warmed up, and nighttime temperatures have climbed into the high 50’s (10-15° C).
 
|
|
|
|
|
|
|
|
Selecting Pepper Seedlings from Nurseries
Seedling roots should just be pressing their pots. The stalks should still be succulent. Ideally, they should go in the ground before flower buds form.
Avoid planting pepper seedlings that have several open flowers, and never plant peppers that have already formed fruit.
Top of Page
|
Pepper Varieties
|
Soil Preparation
|
Planting
Watering
|
Fertilizing
|
Plant Care
|
Pests
|
Diseases
Companion Plants
|
Container Peppers
|
Harvesting Peppers
Hot Pepper Varieties
Garden Preparation for Growing Peppers
Peppers and chiles are heavy feeders and do best with a deep root zone—18-24” (45-60 cm)—in soil with ample organic matter, adequate phosphorous, and a good supply of calcium.
Incorporate 2-3” (5-8 cm) of good garden compost or composted manure into the soil before planting.
Till or cultivate soil amendments into the soil, don't just spread them over the surface. Organic soil amendments need microbial action to release most of their nutrients, so don’t just layer them over the surface. Mix them into the soil so they’re in contact with microbes for best results.
If necessary, adjust soil pH. Optimal pH for growing peppers is 6.0-6.5, or a slightly acidic soil. See Changing Soil pH for ways to lower soil pH.
(Click IMAGE to Enlarge) | |
| After clearing weeds, layer on organic soil amendments. Here, I’ve added a thin layer of alfalfa meal for early-season nitrogen, feather meal for late-season nitrogen, greensand for potassium, colloidal phosphate for phosphorous, and a dusting of kelp meal for trace minerals (see below for amounts). A 2” layer of good garden compost goes over the top. | 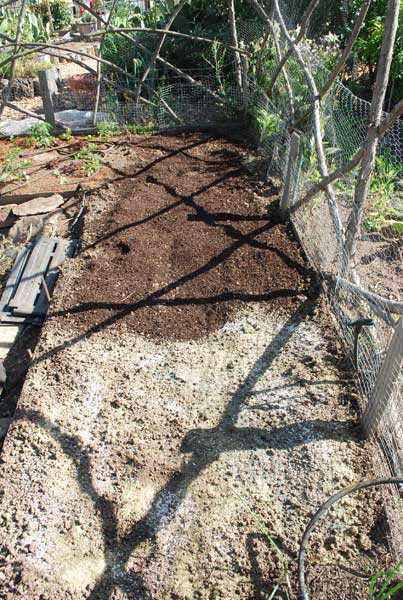 |
| Never step directly onto a raised garden bed. Walking on soil compacts it, reducing its ability to hold air and water and making it harder for roots to penetrate. Stand on a board so your weight is distributed over a larger area, and use a hoe or grape mattock to mix the layers of soil, compost, and soil amendments. | 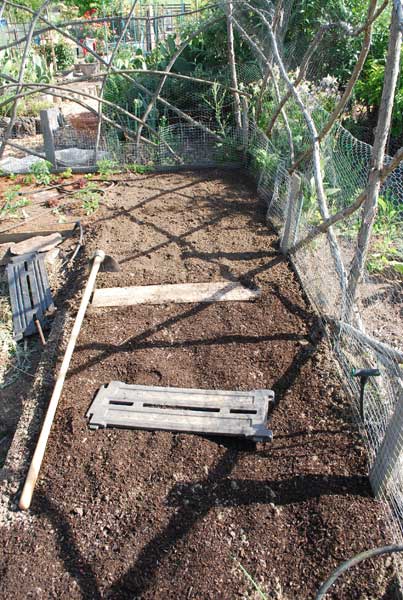 |
| Organic soil amendments need to be in contact with soil microbes to release their nutrients. I usually do 2 passes with the hoe so the amendments are thoroughly mixed into the soil. A tiller can also be used for this purpose. | 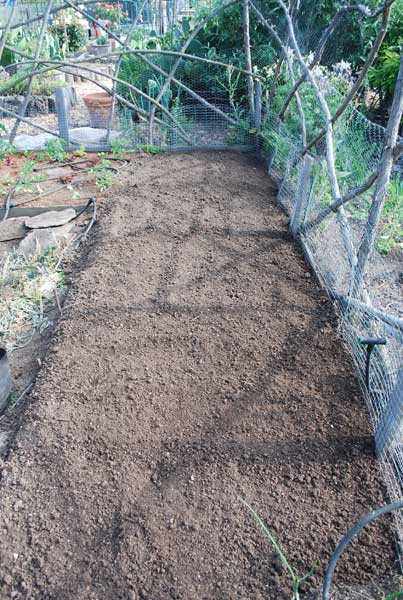
|
| Replace soaker lines and stepping stones. The stepping stones allow access to the back of the bed for weeding, without walking on and compacting the soil. | 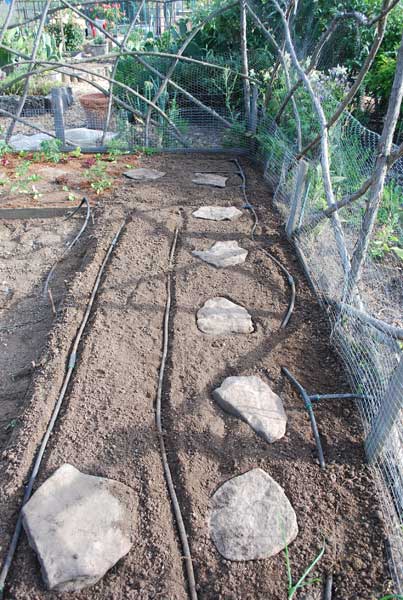
|
| Arrange the peppers for planting. Proper plant spacing is critical when growing peppers. See Pepper Plant Spacing below for tips on proper plant spacing. | 
|
| Final plant spacing. Plant peppers so the top of the root mass is slightly below (no more than ½”—1 cm—below the soil line. After planting, mulch the bed with ½” of fine mulch or straw, to hold in moisture and reduce surface crusting. Because we had a week of cold weather when I planted, I waited till warm weather to mulch, so the soil would warm up more. | 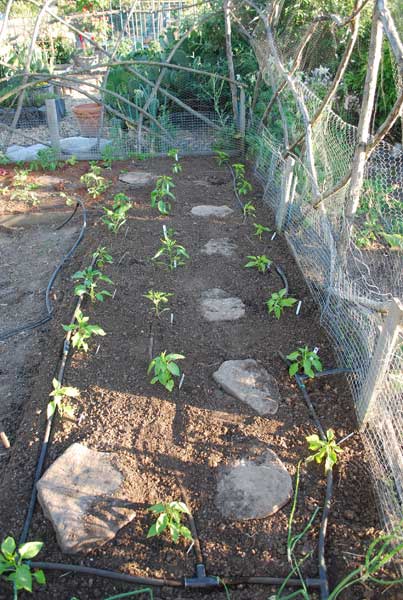
|
|
|
© Steve Masley…Click IMAGE to Enlarge |
When I prepare a new raised garden bed, I mix in 3-4” (7-10 cm) of good garden compost or composted manure into the soil—2” (5 cm) in the bottom layer, and 2” (5 cm) in the top layer. I also add organic soil amendments to compensate for soil deficiencies or harvest losses.
I take care of several clients’ gardens as well as my own, so it’s always cheaper for me to buy organic soil amendments in bulk. This also lets me mix my own blends for each garden, tweaking the mix for each bed.
For heavy feeders like tomatoes, peppers, cucumbers, or squash, I mix in a cocktail of organic soil amendments. For most gardeners, it makes more sense to use a balanced organic fertilizer, but here’s my recipe for the adventurous organic gardener below:
Organic Soil Amendments for Growing Peppers (pounds per 100 square feet (3 square meters) of bed space), First and Second Year:
- 8lbs (3.5kg) Alfalfa Meal OR 8lbs (3.5kg) Worm Castings OR 6lbs (2.7kg) soy meal, for early-season nitrogen.
- 1-2lbs (0.5-1kg) Feather Meal, for late-season nitrogen—kicks in after alfalfa meal is spent.
- 8-10lbs (3.5-4.5kg) Soft Rock Phosphate, also known as colloidal phosphate, for phosphorous.
- 1-2lbs (0.5-1kg) Ground Oyster Shell or dried, crushed eggshells for calcium
- 1-2lbs (0.5-1kg) Greensand for potassium
- 1/2-1lb (0.25-.05kg) Kelp Meal for trace minerals to boost plant immunity. Kelp meal contains plant hormones that boost plant growth and immunity at low levels, but inhibit them at higher levels. Don’t use more than 1lb (0.5kg) of kelp meal/100 square feet (/3 square meters).
When you’re growing peppers and other heavy feeders, you’ll need to add organic nitrogen of some kind every season, but the amount diminishes as you improve your soil.
The soft phosphate and greensand will supply phosphorous and potassium for 2-3 years, and won’t need to be renewed annually.
For more information on organic soil amendments, click Here.
If you have a small garden, it’s simpler and makes more sense to just buy a balanced organic fertilizer like Dr. Earth Organic Tomato, Vegetable, and Herb Fertilizer.
Once you’ve increased soil organic matter and you’re recycling nutrients by composting and rotating legumes, you can reduce and gradually phase out organic soil amendment applications.
Top of Page
|
Pepper Varieties
|
Soil Preparation
|
Planting
Watering
|
Fertilizing
|
Plant Care
|
Pests
|
Diseases
Companion Plants
|
Container Peppers
|
Harvesting Peppers
Hot Pepper Varieties
Planting Peppers
Pepper Plant Spacing
When growing peppers in a single-dug bed (soil prepared to 8-10”—20-25 cm), set pepper plants 16-18” (40-45 cm) apart in rows 24-30” (61-76 cm) apart.
When growing peppers in a deep-dug or raised garden bed (soil prepared to a depth of 20-24”—51-61cm), set pepper plants on 16-18” (40-45 cm) centers (plants 16-18”—40-45 cm—apart in all directions).
|
|
© Steve Masley…Click IMAGE to Enlarge |
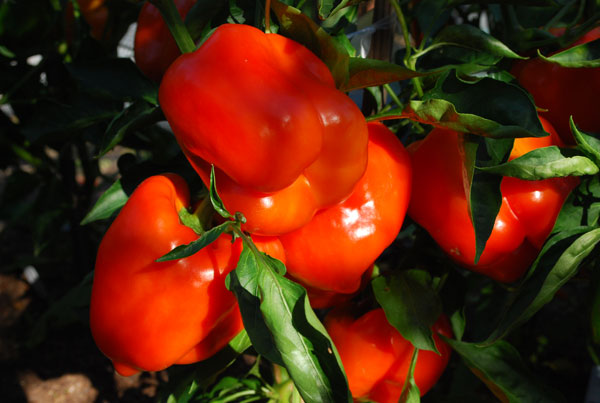
Tip: If Sun Scald—scarring on the side of the pepper with the greatest sun exposure—is an issue in your garden, set pepper plants on narrower (14-16”—36-41 cm) spacing, so the plant crowns touch and shade the peppers. In the photo at left, note that the leaves to the right and left of the damaged peppers protected the peppers below.
In cool, moist climates, increase spacing to improve air circulation and reduce bacterial and fungal leaf diseases.
Top of Page
|
Pepper Varieties
|
Soil Preparation
|
Planting
Watering
|
Fertilizing
|
Plant Care
|
Pests
|
Diseases
Companion Plants
|
Container Peppers
|
Harvesting Peppers
Hot Pepper Varieties
Care and Feeding of Peppers
Watering Peppers
Growing peppers requires regular, steady water, 1-1 ½” (2.5-3.8 cm) per week. When growing peppers, drip irrigation is preferred, especially after plants start flowering and setting fruit.
In our dry climate, I’ve never had a problem using overhead watering on peppers and chiles, but in more humid climates where bacterial and fungal leaf blights are common, overhead watering can create problems, so drip irrigation is best in these situations.
Fertilizing Peppers
If you follow the organic soil amendment recommendations under preparation above when planting peppers, subsequent fertilizing shouldn’t be necessary.
However, if your peppers fail to thrive or the leaves have a yellowish cast, a shot of fish emulsion, compost extract, or compost tea may help.
Pepper Plant Care
One of the things I love about growing peppers is their ease of care.
Once the soil is amended and they’re in the ground, they need little care beyond providing support for the plants once they start fruiting.
They can be staked and tied, but their fountain shape may be contained better by hoop stakes.
Conical tomato cages available from garden centers are an easy, if unattractive, option. I’m not a big fan of shiny things in the foliage. They stand out too much, and detract from the natural beauty of the plants.
Sometimes you can buy dark green tomato cones that blend better with the foliage. If you can find them, these are a good choice for plant support when growing peppers.
Top of Page
|
Pepper Varieties
|
Soil Preparation
|
Planting
Watering
|
Fertilizing
|
Plant Care
|
Pests
|
Diseases
Companion Plants
|
Container Peppers
|
Harvesting Peppers
Hot Pepper Varieties
Pepper Pests
In most home gardens, peppers and chiles are resilient plants, with few garden pests. As seedlings, they’re vulnerable to cutworms and snails, but once they’re past the seedling stage, not many insects bother them.
Pepper Diseases
Peppers are subject to viral diseases like Cucumber Mosaic Virus, Beet Curly Top (Western Yellows), Tobacco Mosaic Virus (TMV), and, primarily in southern gardens, Potato Virus Y (PVY).
Symptoms and their effects vary depending on the vigor of the plant and stage of plant growth when infected. Leaf mottling and stunting are common. Fruit that is already set may ripen, but size and quality generally suffers.
Mosaic viruses are transmitted by biting insects like aphids, so it’s best to cull infected plants to prevent spread to healthy plants nearby. It’s okay to compost virus-infected plants—viruses need living hosts to spread, and won’t survive for long even in a static compost pile.
Cornell’s Vegetable MD Online has an article on pepper diseases, complete with photos. They also have a list of disease-resistant bell peppers and disease-resistant hot peppers.
Top of Page
|
Pepper Varieties
|
Soil Preparation
|
Planting
Watering
|
Fertilizing
|
Plant Care
|
Pests
|
Diseases
Companion Plants
|
Container Peppers
|
Harvesting Peppers
Hot Pepper Varieties
Other Pepper Issues
|
|
© Steve Masley…Click IMAGE to Enlarge |
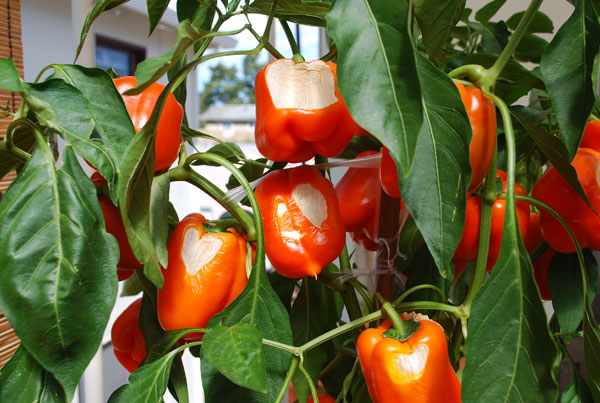
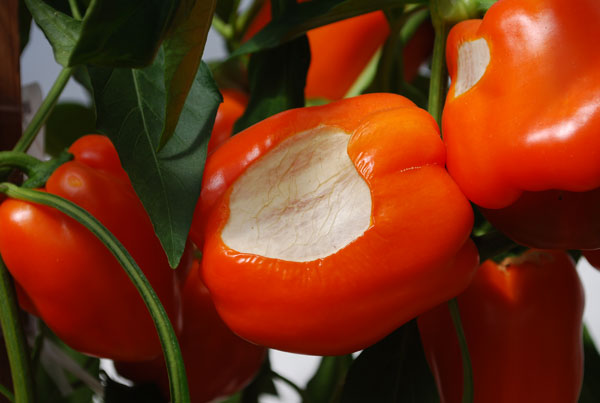
Sunscald is a scarring that occurs on fruit on the sunniest side of the plant. The skin burns, becomes thin, and eventually dries out and becomes brittle and breaks, allowing molds to enter the pepper.
Harvest peppers showing signs of sunscald, and cut out the scarred part of the pepper, along with any soft or damaged parts around the burned area. The rest of the pepper is usually fine to eat if you use it quickly, but check for mold if you've had a lot of rain after the fruit was damaged.
As mentioned under pepper plant spacing, if sunscald is a problem in your garden, tighten spacing so the crowns of the plants are touching at maturity. This will shade the fruit below, preventing sunscald.
Of course, increase your organic fertilizer rate when you tighten spacing, the soil needs to be richer if the plants are closer together.
For plants that are already widely spaced, you need to shade the fruit from the hottest afternoon sun.
Shade net is an easy way to do this. 33% shade net blocks 1/3 of the incoming light, and should be sufficient to prevent sunscald in most situations. 50% is more widely available, and should be used in the hottest areas further south.
Leaf Roll, where the leaves curl downward, is common when growing peppers. Frequently seen on the lower leaves of peppers and tomatoes, it’s not a problem unless it’s accompanied by yellowing or stunting of the plant, which may indicate viral infection.
Top of Page
|
Pepper Varieties
|
Soil Preparation
|
Planting
Watering
|
Fertilizing
|
Plant Care
|
Pests
|
Diseases
Companion Plants
|
Container Peppers
|
Harvesting Peppers
Hot Pepper Varieties
Companion Plants for Peppers
|
|
© Steve Masley…Click IMAGE to Enlarge |
Peppers don’t really have a lot of insect pests, so there’s really no need for aromatic herbs as companion plants to deter pests.
Peppers are compatible with most garden vegetables, and their beautiful fountain shapes make them a nice addition to flowerbeds.
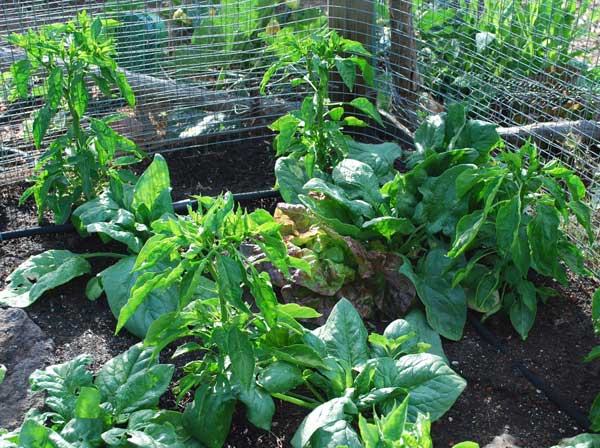
When growing peppers, I like to interplant lettuce or spinach plants to fill in the spaces between pepper seedlings. The leafy vegetables mature while the peppers are getting established. They tap the top 6” of soil with their shallow roots, while the peppers send their roots deep into the soil.
Early in the season, the crops don’t compete very much, because their roots occupy different soil regions.
The foliage of the lettuces and spinach acts as a “living mulch”, protecting the soil surface from pounding rain or the drying effects of the sun. The canopy of leaves also holds in carbon dioxide generated by soil microbes, giving your vegetables a boost.
Be sure to pull the lettuces or spinach plants up after cutting off the leaves.
This allows the peppers to take over the entire bed, at just the stage in their growth where they need the added resources.
If you leave the short-term, leafy vegetables in place, they’ll tap deeper soil resources to re-sprout, competing with your peppers. You’ll get fewer—and smaller—peppers.
Top of Page
|
Pepper Varieties
|
Soil Preparation
|
Planting
Watering
|
Fertilizing
|
Plant Care
|
Pests
|
Diseases
Companion Plants
|
Container Peppers
|
Harvesting Peppers
Hot Pepper Varieties
Back to Growing Hot Peppers
Growing Peppers in Containers
|
|
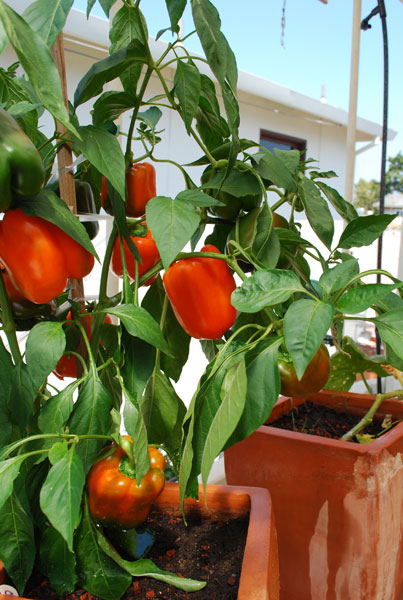
‘Gourmet’ Bell Pepper © Steve Masley Click IMAGE to Enlarge |
Growing peppers in containers is easy and rewarding, as long as you start with a large enough pot, a good organic potting mix, and water frequently.
A 5-gallon pot is about the minimum pot size for growing container peppers, with one plant per pot. These 'Gourmet' peppers were grown in a 5-gallon terra-cotta pot. A 7-gallon pot will increase yields by 15-20%.
|
|
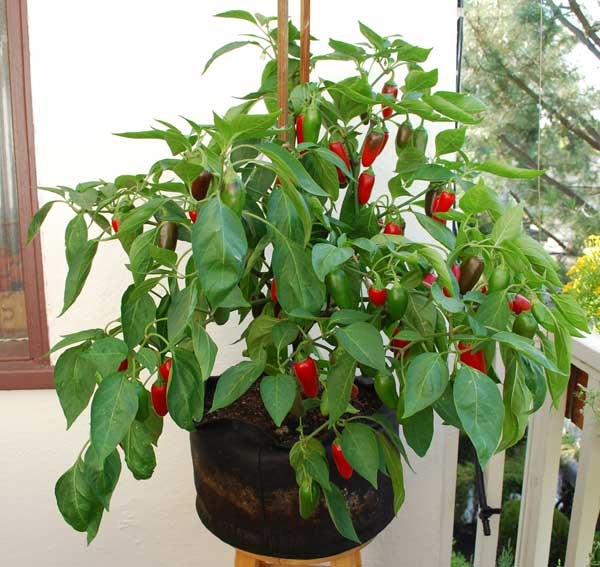
‘Early Jalapeno’© Steve Masley Click IMAGE to Enlarge |
Pots larger than 7 gallons don't produce a large bump in yield–except in the case of large chile plants like Aji Limo–but the plants are more resilient and need less frequent watering.
7-gallon Smart Pots are ideal for growing peppers, chiles, eggplants, cucumbers, and determinate (bush) tomatoes in containers. Smart Pots create a fine, fibrous root system that makes the best use of organic soil amendments in container mixes.
For organic soil amendments for container-grown peppers, click Here.
For most vegetables, you have to be very particular choosing varieties that perform well in containers. This is not the case with peppers and chiles. If they have a 5-7 gallon container and a good potting mix, any and all varieties of peppers will thrive in containers.
Top of Page
|
Pepper Varieties
|
Soil Preparation
|
Planting
Watering
|
Fertilizing
|
Plant Care
|
Pests
|
Diseases
Companion Plants
|
Container Peppers
|
Harvesting Peppers
Hot Pepper Varieties
Harvesting Peppers
|
|
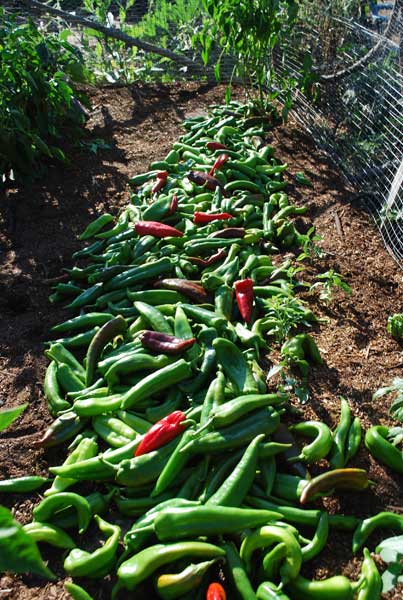
from 16 Plants! © Steve Masley Click IMAGE to Enlarge |
When growing peppers, harvesting time depends on what you plan to do with them.
You can start harvesting sweet or bell peppers green, as soon as the walls of the peppers thicken, but the best flavor develops as the fruit ripens and reaches full color.
Peppers harvested early are good raw, sautéed, and in stir-fries.
Ripe bell peppers reach the peak of flavor and nutritional quality when they’re deeply colored, but the walls are still thick and succulent. Fully ripe peppers are sweet, and the sugars caramelize when grilled or roasted.
Fruit quality suffers if you leave the peppers on the plants past peak ripeness. Overripe peppers become wrinkly and soft, and are subject to attack by molds and bacteria.
For information (and recipes) on harvesting hot peppers and chiles, click Here.
Top of Page
|
Pepper Varieties
|
Soil Preparation
|
Planting
Watering
|
Fertilizing
|
Plant Care
|
Pests
|
Diseases
Companion Plants
|
Container Peppers
|
Harvesting Peppers
Hot Pepper Varieties
Top of Page
|
How to Grow Peppers
Growing Peppers in Containers
|
Sweet Pepper Varieties
Hot Pepper Varieties
|
Fertilizing Container Peppers


Copyright © 2009-2025, by Steve Masley, Grow-it-Organically.com
All rights reserved
![]()
HOME | About Us | Contact Us | Privacy
New! Comments
Have a question or comment about what you just read? Leave me a comment in the box below.