Harvesting Basil
Harvesting basil is as simple as pinching off sprigs, as long as the plants are young and tender.
|
|
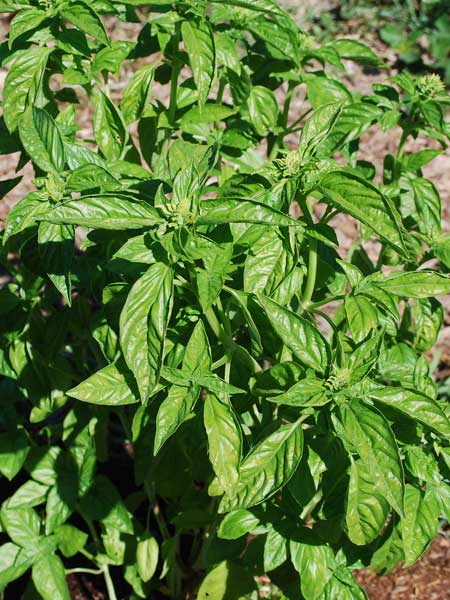
Click IMAGE to Enlarge |
Just trace the stem down and pinch it off above where leaves branch out from the main stem. It should snap off easily. Pinch off all the stems that have flower stalks forming at their tips.
Side shoots sprout and branch off from the main stem where the leaves join it.
Later, when the plants start getting woody, it's easier to snip off what you want to harvest with a hand pruner or a pair of garden sheers. Breaking pieces off leaves jagged edges that can become infected with fusarium wilt.
Growing Basil
|
Growing Basil in Containers
Planting Herbs
|
Growing Cilantro
|
Growing Chives
Once the plants flower and start setting seed, leaf production stops, so it’s important to keep ahead of the flowers. See Growing Basil for other tips on how to grow basil.
Pick off the leaves, side shoots, and tender flowers, and use them in sauces, sautés, or salads. If you have more sprigs than you can use after harvesting basil, place them in a small jar of water, as you would fresh flowers. Keep them out of direct sun and they’ll stay fresh for a few days.
Harvesting Basil for Fresh Use
No matter how meticulous you are at harvesting basil, the flowers will inevitably win out. When they do, it’s time to make pesto.
Are Basil Flowers Edible?
Young, tender basil flowers are quite tasty—and beautiful in a salad!—but seed capsules are coarse and gritty. To avoid them, strip the flowers only from the tender tips of the flower spikes. Leave the rest for the bees.
Harvest basil when the leaves are at their peak, before a lot of flowers form. You can harvest whole plants, or cut off all but a couple of branches. I like to leave a couple flowering branches for the bees.
To harvest whole plants, cut them off 3” (7cm) above the ground with a hand pruner. Shake the plants to dislodge any bugs, and pick off any dead or yellow leaves near the bottom of the plant.
Strip the leaves, and pinch the tips off side shoots. If the plants have started to flower, strip the tender flowers from the tips of the flower spikes, and be sure to pinch off any small leaves near the base of the flower spikes. They may be small, but they’re the most flavorful leaves on the plant.
"Basil Cubes", an easy way to preserve some of that fresh basil flavor well into the winter.
Once you have a bowl full of basil leaves and tender shoots, you can either make pesto, or basil cubes. See Steve’s Cinnamon Basil pesto recipe for a variation on classic pesto.
For basil cubes, add a tablespoon of grapeseed or other neutral-flavored oil per cup of leaves, and process in a blender or food processor like you would for pesto. (Don’t use olive oil unless you plan to use the cubes only for Mediterranean dishes).
Process till the leaves are in small bits. Scrape the sides of the processor down and add just enough water to form a coarse paste when you process it again.
Scoop the blended basil into ice cube trays, packing each cell with a rubber spatula or teaspoon to squeeze out air. Fill as many cells as you have basil for, and put the tray in the freezer.
The next day, turn the cubes out into a freezer bag or container, label it, and put it in the door of the freezer, where you can easily grab a couple of cubes.
Use basil cubes individually or a few at a time to flavor curries and sauces during the fall and winter. Pesto can also be frozen this way. Basil or pesto cubes will last 3-4 months in the freezer.
| Steve's Cinnamon Basil Pesto |
|
|
Place ingredients in a food processor and process till you have a smooth paste. Scrape the sides of the processor down with a rubber spatula and process pesto to an even texture. |
Return to Growing Basil
Harvesting Basil for Drying
There’s some debate on the best time for harvesting basil for drying. Some gardeners insist the flavor is best when you harvest at the same time as you would for fresh basil—that is, just before the plants flower, when the leaves are lush.
Others believe letting the plant flower before harvesting basil improves the flavor of the leaves used for drying. Mature leaves are more pungent, with a more intricate mix of essential oils.
I’m in the latter camp, but either way, dried basil from your garden is a huge improvement over anything you’ll find in stores.
It’s much easier to distinguish weak or diseased leaves immediately after harvesting basil, so if you’re planning to dry the leaves, groom the plants before drying. Pick off any yellow or spotted leaves.
Warm, dry shade is best for drying herbs. An attic is ideal, but the top of a cabinet works. Bundle whole groomed plants with garden twine, and suspend the bundles in an attic.
If you have just a few plants, cut whole plants into several pieces and dry in a paper grocery bag placed on it’s side on top of a cabinet, or high up on a shelf.
Leave for 1-2 weeks, then strip the leaves from the stems over an open newspaper. Pick out any twiggy material or coarse stems. The leaves should be dry and crumbly, but don’t break them up too much. Whole leaves store better than crumbled leaves, so it’s better to leave the dried leaves as intact as possible when storing, and crumble them at the last minute.If any of the leaves are leathery, turn the oven on for 2 minutes, then turn it off. Make sure the oven is off. Place the leaves on a baking tray and put it in the closed oven. Leave for half an hour, then process as above.
Dump the leaves into canning jars and store in cool, dry shade. Warm, dry shade is best for drying, but cool, dry shade is best for storage.
Use dried basil in sauces, marinades, or sprinkled over roasted chicken. Dried lemon or lime basil retains its citrussy edge, and is great in seafood and shellfish dishes.
Basil stored this way will still smell like basil a year later, even if you’ve been opening the jar and using it throughout the year.
Top of Harvesting Basil
|
Growing Basil
|
Container Basil
Planting Herbs
|
Growing Cilantro
|
Growing Chives


Copyright © 2009-2025, by Steve Masley, Grow-it-Organically.com
All rights reserved
![]()
HOME | About Us | Contact Us | Privacy
New! Comments
Have a question or comment about what you just read? Leave me a comment in the box below.