Growing Hot Peppers and Chiles
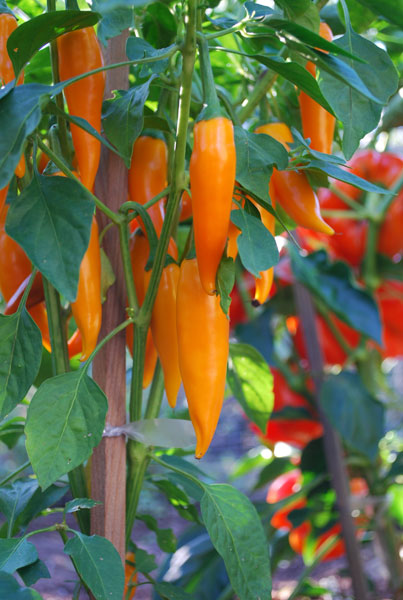
Growing hot peppers is even easier than growing bell peppers. The plants are larger, more robust, and have this beautiful fountain shape that makes them a perfect fit in any edible landscape.
|
|
Carrot' © Steve Masley Click IMAGE to Enlarge |
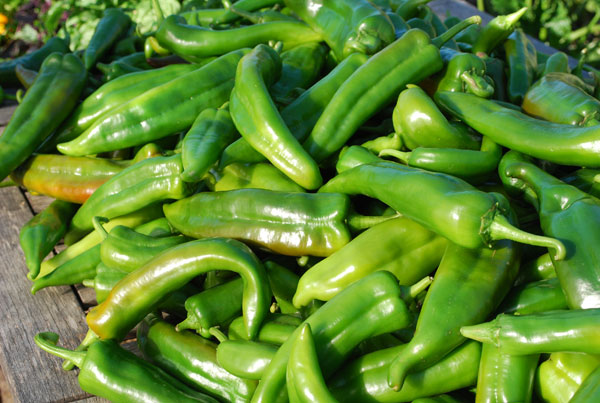
And as August rolls around and the peak of summer harvest arrives, hot peppers—New Mexico green chiles in particular—are the vegetables I look forward to the most.
It’s time for open-faced enchiladas with Santa Fe Green Chile! This is what makes growing hot peppers so rewarding.
There’s the ritual of roasting chiles—the whistle of chiles venting steam, and the snap of flames scorching chile skins, wisps of green chile smoke rising over the burners or grill.
After the skins are blistered all around, the chiles go into a paper bag with the top folded down to make a steamy tent. By tradition, my wife always gets the first whiff when we open the bag to peel the chiles.
When growing hot peppers, you can harvest them green, like bell peppers, or allow them to ripen for drying.
|
|
|
| |
Hot Pepper Varieties
|
How to Grow Hot Peppers
Growing Hot Peppers in Containers
|
Harvesting Hot Peppers
New Mexico Green Chile Recipe
Some hot peppers reach peak heat just before they change color and ripen. The heat defends seed production from rodents, who would otherwise eat the peppers before the seeds are fully formed.
Others continue to get hotter as they turn red and ripen. The bright color attracts birds to eat the fruit and disburse the seeds.
Nature seems to favor birds for chile pepper seed disbursal. The heat of the chile comes from Capsaicin. Mammals have capsaicin receptors, and can feel the burn. Birds lack capsaicin receptors. For birds, chiles are a tasty source of vitamins.
If you don’t believe it, just watch an Amazon parrot tackle a bowl of habaneros!
Whether you’re growing hot peppers or growing bell peppers, the plants are close cousins and share the same soil, water, and cultural needs, as well as the same pests and diseases.
Hot peppers are actually easier to grow, because they need less support. Chiles tend to be larger, stronger plants, with smaller, more numerous fruit. For information on how to grow hot peppers, see Growing Peppers.
Hot Peppers and Chiles in the News
Hot peppers and chiles have a wide range of health benefits, from reduced blood pressure to weight loss.
James Gorman has good article on chiles in the New York Times.
Hot Pepper Varieties
|
How to Grow Hot Peppers
Chile Peppers in Containers
|
Harvesting Hot Peppers
New Mexico Green Chile Recipe
Harvesting Hot Peppers and Chiles
|
|
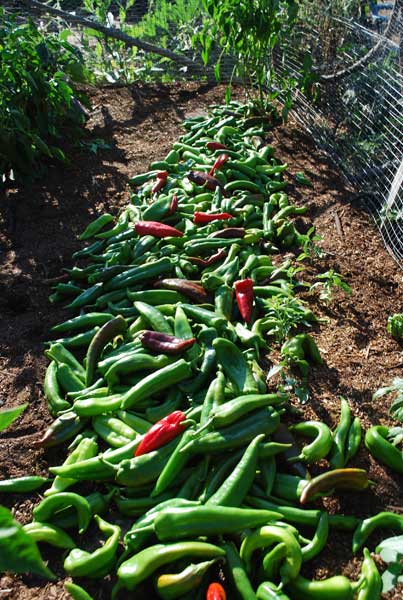
from 16 Plants! © Steve Masley Click IMAGE to Enlarge |
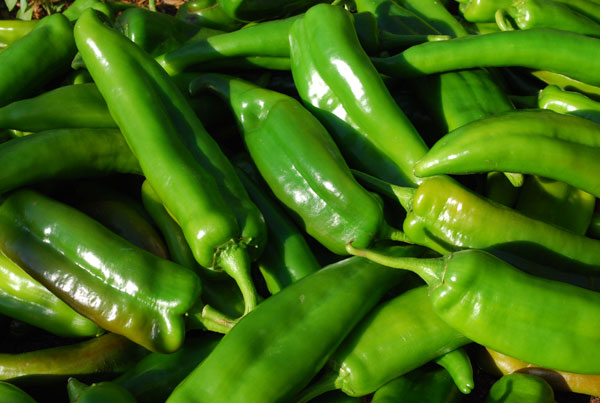
If you’re growing hot peppers, when to harvest depends on the type of pepper, and what you plan to do with them.
For New Mexico Green Chile Sauce, harvest green chiles when the walls of the peppers are still succulent, but before they start turning yellow or red.
New Mexico or Anaheim-style hot peppers can also be allowed to ripen to red, and dried for ristras to supply chile colorado (red chile sauce) through the winter.
If you're growing hot peppers like jalapenos and Serranos, these chiles are usually harvested green, when they’re at their hottest. If allowed to ripen to red, they get sweeter, and lose some of their heat.
Red, ripe jalapenos can be smoked for 3-4 hours over applewood or other fruitwood, then dried to make delicious chipotle chiles. Ripe serranos are often pickled in vinegar for use through the fall and winter.
Some hot peppers aren’t meant to be eaten raw or roasted, they’re grown to be dried, and added to food throughout the year.
Hot Pepper Varieties
|
How to Grow Hot Peppers
Chile Peppers in Containers
|
Harvesting Hot Peppers
New Mexico Green Chile Recipe
Roasting and Processing Hot Peppers, Roasting Chiles
(Click IMAGE to Enlarge) |
|
|

|
|
In New Mexico during green chile season, supermarkets have propane chile roasters in the parking lot, and for a small fee, you can toss your chiles in on the way out to your car.
Handle Hot Peppers With Caution!
Avoid touching your eyes or sensitive skin when handling hot peppers!To prevent burning between your fingers, wear rubber gloves, or coat your hands with cooking oil when handling chiles. Capsaicin stays in the oil, and can easily be washed off with soap and water after you’re done.
They go into a rotating wire cage with a row of blasting propane torches along one side, and the skins are nicely blistered in a few minutes. The aroma drifting through the parking lot is incredible!
By the time you get home, your chiles have steamed in the bag and are ready to peel and clean.
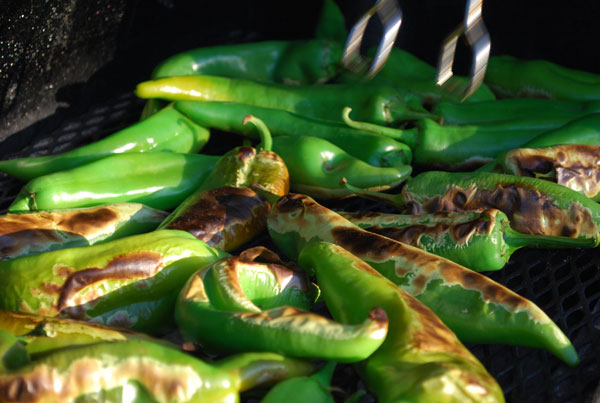
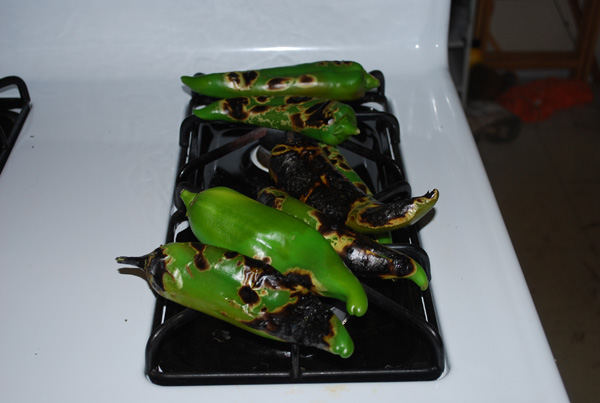
You can roast green chiles easily at home, over the burners of a gas stove, on a grill, or in a table-top chile roaster. Thick-walled, fresh green chiles can go right on the coals for a deeper roasted flavor.
Whether you're roasting chiles on the stovetop or on a grill, use tongs to turn the chiles to blister the skins all around, then drop them in a paper bag and fold the top down to hold in heat. Place the bag inside a large bowl to catch any juices that run out of the chiles. Allow the chiles to steam for 5-10 minutes.
If you love roasted chiles, bell peppers, and eggplants and grow a lot of them, as I do, you can buy table top chile roasters that make short work of the roasting process. Santa Barbara Chile Roaster makes one that can roast up to 21 lbs (about a full 5-gallon bucket) of Big Jims or Joe Parkers in 7 or 8 minutes. You can also roast bell peppers, eggplants, corn, and other vegetables.
Once the chiles are roasted, place them in a paper bag as you would if you'd roasted them on the stovetop or grill.
Peeling and Seeding Chiles
|
|
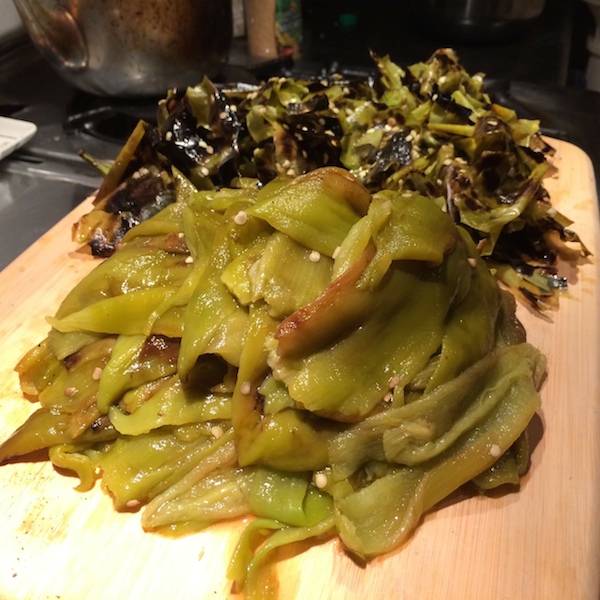
Ready to Make Sauce © Steve Masley Click IMAGE to Enlarge |
After they've steamed for a while, it's time to peel and seed them. Over a large bowl, slip the charred skins off, pinch out the stem, and pull out the core and as many seeds as you can. Then tear the side of the chile from top to tip.
Holding the tip of a split chili upside-down between the thumb and forefinger of one hand, make a “V” with the forefinger and middle finger of the other hand—one finger inside the chile, and one finger outside—and use a downward swipe to strip most of the seeds into the bowl, along with any juices that run out of the chile.
If the chiles are too hot, strip out some of the membrane where the seeds were. Capsaicin is concentrated in seed membranes and seeds.
Open the chiles out and stack them flat, one on top of another, on a cutting board. Slice the mass lengthwise in 1/4”-3/8” slices, then crosswise to form dice. Strain the seeds out of the roasted chile juice and add the juice to your sauce.
| New Mexico Green Chile Sauce for Open-Faced Enchiladas |
|
|
Saute the chopped onion in the olive oil over medium heat, stirring occasionally. After 2-3 minutes, add the minced garlic and cumin and stir. Saute 2 minutes longer, sprinkle on the flour, and stir. Continue stirring until the flour is lightly toasted, 1-2 minutes. Mix in 1 cup of stock or water and stir. Add the chopped green chilies, salt, and pepper. Reduce heat and simmer, partially covered, for 25 minutes, stirring occasionally. Taste and adjust seasonings. For more heat, add chopped jalapeno or Serrano chiles, or cayenne to taste. If the sauce is too thick, add more water or stock. A too-thick sauce scorches easily. The sauce should be about the consistency of chunky tomato sauce. Heat the tortillas on a comal, or wrapped in a tea towel in the microwave. Fry or scramble enough eggs for each person. Lay a tortilla on the plate, cover with shredded cheese, and ladle on enough green chile sauce to cover. Place another tortilla on top, more cheese, and then a fried or scrambled egg. Cover with another ladle of sauce and serve. |
Drying Hot Peppers and Chiles
If you're drying chiles, allow them to ripen on the plant until bright red. If cold, wet weather threatens late in the season, harvest and bring indoors to finish drying.
Dry in a food dehydrator, or, if you're in a drier climate, on wracks indoors, high up on a cabinet where it stays warm. Rotate twice a week. Watch for moldy chiles and cull them so spores don't spread to other peppers.
Whole dried chiles can be stored in plastic bags or jars and kept in a cool, dark, dry place.
When thoroughly dry, remove stems from a few chiles and grind to a coarse or fine powder in a spice or coffee grinder. Store in spice jars. Whole dried chiles keep for months or years, so grind in small batches as needed.
Go to Growing Peppers
Top of Page
|
Hot Pepper Varieties
|
Growing Peppers
Sweet Pepper Varieties


Copyright © 2009-2025, by Steve Masley, Grow-it-Organically.com
All rights reserved
![]()
HOME | About Us | Contact Us | Privacy
New! Comments
Have a question or comment about what you just read? Leave me a comment in the box below.