How Hot Composting Works
Hot Composting is a form of accelerated composting that yields finished compost in 3-6 weeks (longer in winter), instead of the 3-6 months needed for static pile composting.
 |
|
© Steve Masley…Click IMAGE to Enlarge |
This compost is dark, rich, and free of viable weed seeds and plant diseases.
In a hot compost pile, the size of the pile—and the particle size and mix of materials that go into it—are optimized to generate high temperatures.
This steamy heat kills weed seeds and plant diseases and dramatically accelerates the composting process, but it has to be managed carefully.
Temperatures in a large, poorly-managed hot compost pile can reach 180° (82° C). On hot days, the dry materials on top of these piles can spontaneously combust!
Apart from the fire hazard, at temperatures above 160° (71° C), all of the oxygen is quickly used up, and the compost pile “goes anaerobic”. That’s when you get problems with odors, nutrient losses, and toxins.
Smell ammonia wafting from your compost pile? That’s your nitrogen, the element most important for plant growth, venting into the atmosphere.
Smell a hint of rotten eggs? That’s your sulfur, needed for critical plant enzymes and plant immunity, dissipating as hydrogen sulfide, rotten egg gas.
See a ghostly, pale image floating over your compost pile? That’s your phosphorous, needed for root and fruit formation, floating away as phosphene gas—the “swamp gas” that floats over boggy areas and landfills, and sometimes results in UFO reports.
(Thanks to Dr. Elaine Ingham, Oregon State University, for this paraphrased description of what goes wrong when compost piles go anaerobic.)
All of these nutrient losses are due to anaerobic bacteria taking over your compost pile, starting with the hot core.
This can happen occasionally in a static compost pile, but it will happen in a hot compost pile, if you don’t turn it when the temperature exceeds 155° (68° C).
Time and Effort
|
Hot Composting Equipment
Processing Compost Ingredients
|
Building a Hot Compost Pile
Monitoring and Turning the Pile
Advantages of Accelerated Composting
Hot Composting has Several Advantages Over Static Pile Composting:
|
|
- It kills weeds and weed seeds. Burmuda grass, mint runners, and bamboo stolons cooked in the middle of a hot compost pile will never sprout again. Weed seeds exposed to high compost heat die as well. At 130° (54° C), weed seeds die in 8-10 hours. At 140° (60° C), it takes 4 hours to kill them. At 150° (65° C), they die in 2 hours.
- It kills plant diseases. Plant diseases thrive in a narrow temperature range. As spores, they can survive much harsher conditions, but the steamy heat of a compost pile makes it hard for them to hold dormancy. Spores that germinate in this moist heat die.
- It degrades or denatures antibiotics and vermicides that are routinely fed to livestock and poultry in factory farm settings, and may be present in their manure. It also degrades pesticide and herbicide residues in kitchen scraps.
- It discourages rodents and other pests. One big disadvantage of static compost piles is that they can become feeding stations for rats and raccoons. Even if you avoid putting meat scraps into the compost and are scrupulous about burying your kitchen scraps in the pile, rodents will smell it, and dig into the pile at night. Once they find food, they’ll be back every night.
Hot composting avoids this problem. The pile heats up to 150° (65° C) within a day or two, and kitchen scraps dissolve quickly in this heat.
The Disadvantage of Hot Composting:
It’s Work
Managing a hot compost pile takes a lot of attention and effort, especially during the first 2 weeks. You have to check the temperature of the pile with a compost thermometer daily, and turn and mix the pile every time the temperature climbs over 155° (68° C).
In practice, this means you’ll probably have to turn the pile every day for at least the first week, and 10-12 times for the first 2 weeks after building a hot compost pile.
Plan on putting at least 12-18 hours into a hot compost pile—most of it the first week.
If you can’t commit to this kind of attention and work, DON’T try hot composting. Use a compost tumbler or build a static compost pile instead.
Top of Page
|
Time & Effort
|
Composting Equipment
Processing Materials
|
Building a Thermal Compost Pile
Monitoring and Turning the Pile
What Happens in a Hot Compost Pile
When there’s enough carbon to fuel the lives of billions of microbes, enough nitrogen and water to build these billions, and enough oxygen to give aerobic bacteria the advantage, magical things happen in compost piles.
|
Composting Pages |
|---|
|
|
|
|
|
|
|
|
|
|
Heat builds in the pile, and thermophilic (heat-loving) bacteria multiply, breaking down all but the most resistant materials around the hot core of the pile, driving off moisture and carbon dioxide in the process.
Even in January you’ll see narrow columns of steam rising from hot compost piles.
As temperature increases in the pile, populations of bacteria rise, dominate, and fall, either going dormant, or becoming fodder for the next wave of bacteria that thrive in hotter temperatures still.
Nutrients in the pile are concentrated and bound into organic molecules, bacterial glues, and the bodies of bacteria, all of which feed the soil food web when the compost is added to the soil.
Top of Page
|
Time & Effort
|
Composting Equipment
Processing Materials
|
Building a Thermal Compost Pile
Monitoring and Turning the Pile
Composting Tools
You’ll need some basic composting equipment for hot composting:
A Compost Thermometer
, (a thermometer with a 20”–50cm– probe) for monitoring compost heat.
This is a critical piece of equipment for thermal composting.
A short, sturdy Spading Fork, with a D-handle, preferably one with square—as opposed to rectangular—tines, for turning the pile. I often bounce forkfuls of compost on the tines to break up clumps as I’m turning the pile. Square tines are stronger and have a thinner profile that allows the material to fall through more easily.
A way to chop or shred compost ingredients. If you have a large yard or garden, a chipper-shredder simplifies processing yard waste. For smaller gardens, you can use a pair of hedge clippers or a machete
and a board to chop compost materials.
A water wand with a shower setting, for even moistening of the layers of the pile.
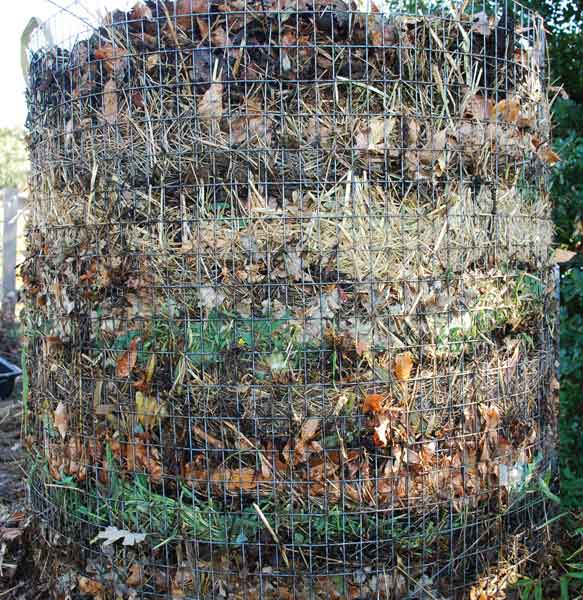
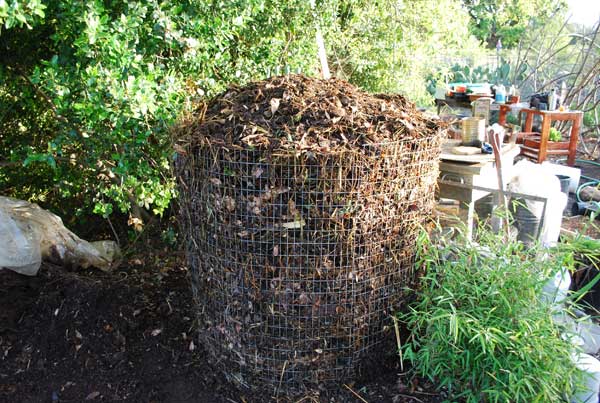
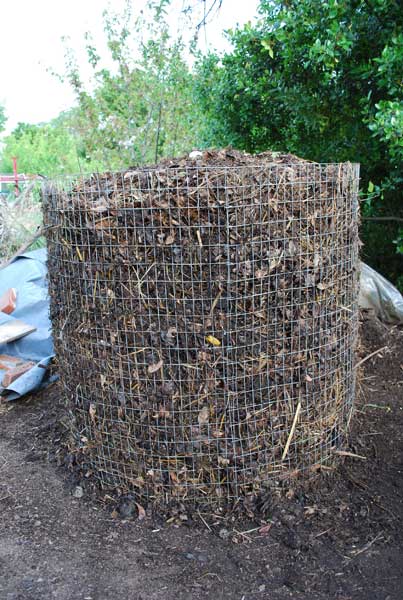
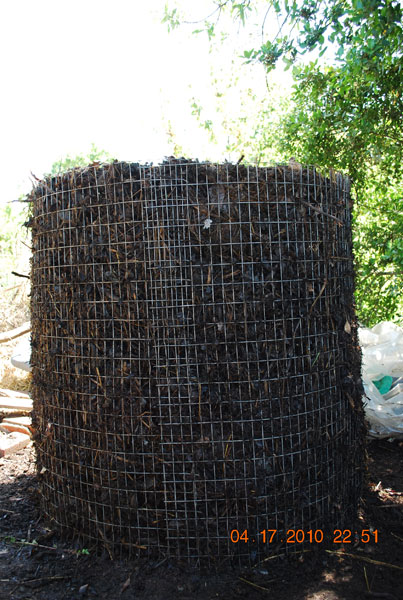
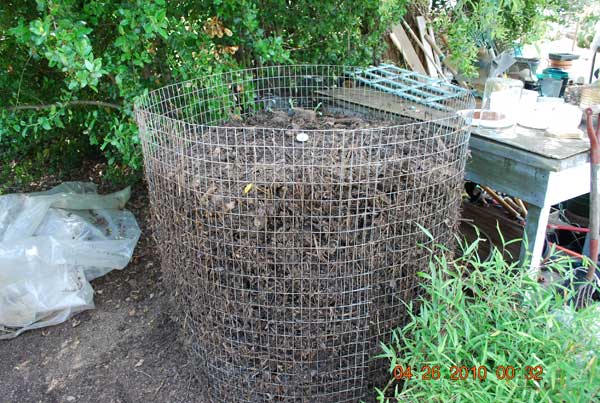
A compost bin or wire cylinder to contain the pile. For accelerated composting, you’ll need a bin or cylinder that’s at least 3’ x 3’ x 3’ (1m x 1m x 1m)—larger, if you’re planning on winter composting.
A compost bin isn’t absolutely necessary for hot composting, but it “stacks” the compost materials, so it heats up faster.
A compost bin or compost tumbler can cost $40-250, but you can achieve the same result with a hoop of welded wire fencing from the hardware store for $40-50.
A 14-foot (3.5 m) length will create a 4-foot (1 m +) diameter hoop, with room to overlap the ends. Use 1x1” (2.5 x 2.5 cm) or 1x2” (2.5 x 5 cm) welded wire. The advantage of hoop bins is you can make them narrower when you don’t have a lot of materials, and wider when you have plenty.
Top of Page
|
Time & Effort
|
Composting Equipment
Processing Materials
|
Building a Thermal Compost Pile
Monitoring and Turning the Pile
Collecting Compost Ingredients
for Hot Composting
Before building a hot compost pile, you’ll need to collect—and process—materials.
Thermal composting requires a certain mass to build compost heat, especially if you’re composting in winter.
(For information on what to compost—and what not to compost—see Compost Ingredients).
Straw bales, bags of tree leaves, lawn trimmings, wood chips, and bags of manure should be collected at your composting site. If you use stalky materials, chop them into 3-4” (7-10 cm) pieces.
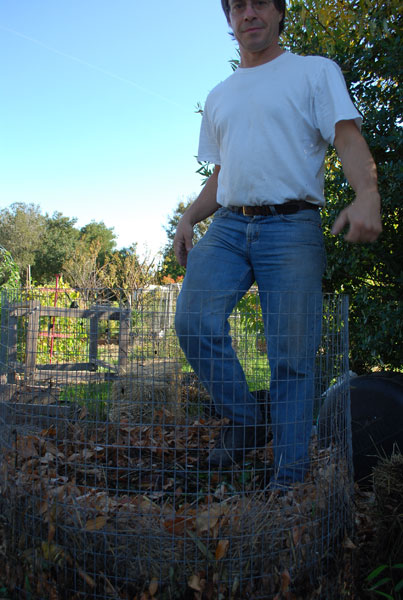
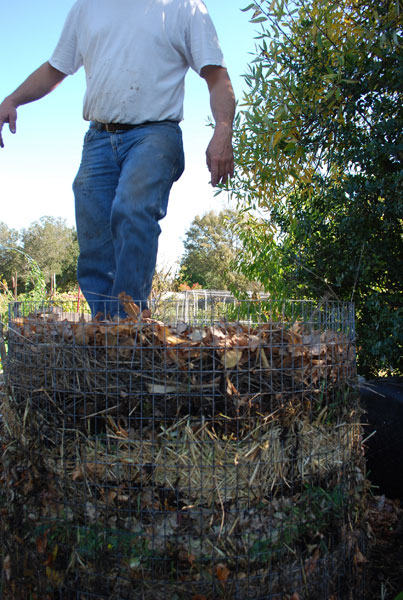
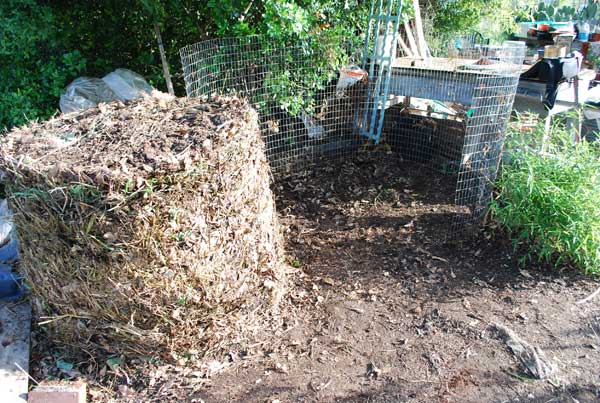
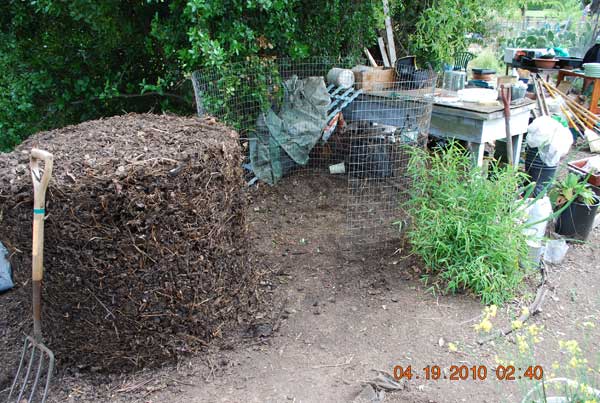
Use a Static Pile to Accumulate Compost Materials, then Hot Compost When You Have Enough Mass
|
|
© Steve Masley…Click IMAGE to Enlarge |
To “pre-compost”, open the compost hoop out to form a wide cylinder, and bury kitchen scraps between thick layers of brown materials.
The pile develops some compost heat, but not enough to require turning. The goal at this point is to start the composting process, and let it “simmer” until you’re ready to turn up the heat.
When the cylinder is almost full, I gather whatever additional compost ingredients I plan to use—tree leaves, straw, stalky materials, wood chips, and manure—then proceed with building a hot compost pile.
Array the materials in small, separate piles around where you plan to build the pile—much as you array pre-chopped vegetables for throwing into a wok when making a stir-fry.
The warm material from the middle of the static pile acts as a compost activator for the rest of the pile.
Top of Page
|
Time & Effort
|
Composting Equipment
Processing Materials
|
Building a Thermal Compost Pile
Monitoring and Turning the Pile
Process Compost Materials Before
Hot Composting
Instead of just layering compost materials on whole, or slightly chopped, as you do in static pile composting, hot composting requires that the compost ingredients be chopped or shredded, to increase the surface area in contact with microbes in the pile.
Smaller pieces also make turning the pile much easier. If you layer whole plants in with manure in a big compost pile, it will heat up to 160° (71° C) in a day or two, and need to be turned.
Most of the leaves will have dissolved in the middle of the pile, but the stems and stalks will remain. They’ll be softened, but still tough and fibrous, and they’ll be threaded through the pile like strands of rope.
Turning such a pile is a nightmare. Every forkful is a tug-of-war. You feel like you’ve been in a wrestling match after turning the compost pile.
The finer the compost materials are shredded, the faster the pile heats up.
If you have access to a chipper-shredder, you can shred green and brown materials at the same time, blending materials as you shred. This creates a fine-textured mix that heats up fast, with high compost heat going almost all the way out to the edges of the bin.
A chipper-shredder also lets you shred tree leaves, so they’re less likely to mat down in the pile.
If you have a large garden and yard, they’re a huge time- and- effort-saver that will help you make better compost, but chipper-shredders, especially good chipper-shredders, don’t come cheap.
Neighbors or other gardeners may be willing to share the cost, so you can pool resources and share the shredder to save money.
They’re a big investment for backyard organic gardeners, one I’ve never been able to justify with my small garden. My solution? A tarp, a board, and a machete.
Spread a tarp on a flat piece of ground near your compost area, and put a couple of sawhorses on top of the tarp. Lay a 2” x 12” (38x286mm) board across the sawhorses. (I built a squared U-shaped frame with 2 boards bolted to 2 x 4’s (38x89mm's), so it’s one piece and easy to move, but a board on sawhorses works as well.)
Pick up an armload of plants to be composted and set it on the board with the long stems going in the same direction as the board.
Roll the plants on top of the board, pulling stray ends into the middle to create a cigar-shaped bundle. Whack it into 3-4” (8-10 cm) pieces with the machete, being careful to keep your fingers at least 8” (20 cm) back from where the blade will cut.
Whack thicker stems into shorter 2-3” (5-8 cm) pieces, and as the stems taper and become thinner, whack longer pieces. To make turning the pile easier, no pieces should be longer than a spading fork is wide, about 10” (25 cm).
Top of Page
|
Time & Effort
|
Composting Equipment
Processing Materials
|
Building a Thermal Compost Pile
Monitoring and Turning the Pile
Building a Hot Compost Pile
In addition to processing the materials first, there are two main differences between hot composting and static pile composting:
- Hot composting uses more nitrogen (thicker green layers) and cellulose materials to heat up the pile.
- In a hot compost pile, you compact (compress) the materials as you build the pile. Compressing the materials brings them into close contact with microbes and each other, so compost heat builds quickly.
|
|
in a Hot Compost Pile © Steve Masley…Click IMAGE to Enlarge |
With hot composting, you start out the same way you do when you build a static compost pile. For photos and an explanation of the process, click Here.
Use thicker layers of green materials as you build the pile, or thin layers of higher-nitrogen materials like manure. Or use a combination of the two.
With static pile composting, you add a slightly thicker green layer when the pile is built up one-third of the way, and again at the 2/3 mark. With hot composting, you add a thick green (high-nitrogen) layer when the pile is 2’ (1.3 m) high, then contain the pile inside a compost bin or wire cylinder.

|
|
in a Hot Compost Pile 2 © Steve Masley…Click IMAGE to Enlarge |
This is also a good time to sprinkle on some Rock Phosphate or rock dust, (rock milling fines) to increase the phosphorous content of your compost. Greensand
is a good source of organic potassium, mined from mineralized sea shells. Dried, ground eggshells added at this time will increase calcium levels.
Sprinkle 1- 1 1/2 lbs (0.7kg) of each or any of these organic soil amendments over the surface of the pile.
In compost piles, inorganic nutrients like these are incorporated into living organisms and organic molecules, which are much more readily absorbed by plants and the soil ecosystem when added to the soil.
WARNING: Do NOT add dolomite lime or large amounts of wood ashes to compost piles (a light dusting of hardwood ashes between layers is okay). Strongly alkaline materials like these increase pH in the pile, and result in nitrogen losses. For a list of materials to avoid in compost piles, click Here.
Claw the manure or green layer—with or without additional organic soil amendments—into the dry materials below with the tines of a spading fork, then spread the mound in the middle flat across the bin.
|
|
in a Hot Compost Pile 3 © Steve Masley…Click IMAGE to Enlarge |
Water the layer using a spray wand. And add a layer of dry brown materials on top. Place a stepladder near the side of the hoop, and climb over the wire onto the pile. Walk around on top of the pile to compress the compost ingredients.
Make sure you walk around the edge of the hoop, not just in the middle. 2 feet (60cm) of loose materials will compress down to about 8” (20 cm) after you’ve walked around on it.
Water the top of the pile, then continue alternating green and brown layers, adding a little soil or active compost between layers, and watering them as you build the pile.
Varying the green and brown materials used in each layer increases microbial diversity in the finished compost.
Adjust the watering time depending on how dry the compost ingredients are—water dry brown layers longer, and moist, green layers less.
For hot composting, aim for a 50% moisture level: Materials should be about as wet as a wrung-out sponge, so only a drop or two of water comes out when you squeeze a handful.
Repeat the process, alternating green and brown layers, adding soil or compost activator, and watering each layer as you build the pile. Every 18” (45 cm) or so, lay down a dry brown layer, and climb on top of the pile to compress it down.
When you’ve used up 2/3 of your compost ingredients, add another high-nitrogen layer, along with another pound or so of soft phosphate, greensand, and/or oyster shell flour, if you’re adding organic soil amendments to the pile.
Mix it in, top with a dry brown layer, walk on the pile, and water it in. Alternate green and brown layers until all of your compost materials are used up.
Top of Page
|
Time & Effort
|
Composting Equipment
Processing Materials
|
Building a Thermal Compost Pile
Monitoring and Turning the Pile
Hot Composting: Monitoring Compost Temperature and Turning the Compost Pile
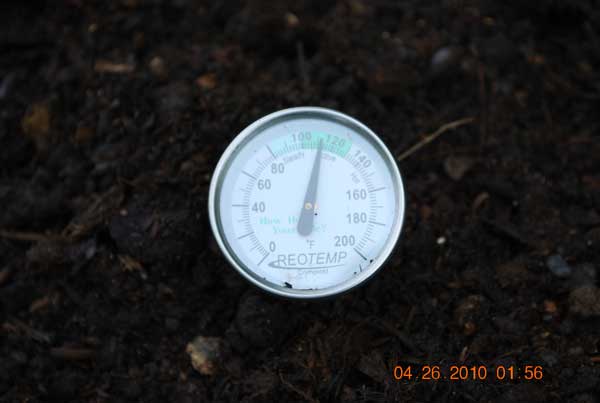
A Compost Thermometer (a thermometer with a 20”–50cm– probe) for monitoring compost heat. This is a critical piece of equipment for thermal composting.
Hot composting requires careful monitoring and frequent turning to prevent the pile from going anaerobic.
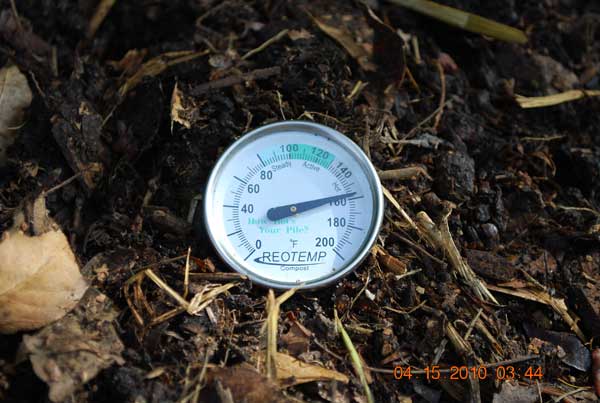
Scientists use an oxygen probe to check oxygen levels in the middle of compost piles, but oxygen probes are expensive and delicate, and you can get the same result using an inexpensive Compost Thermometer.
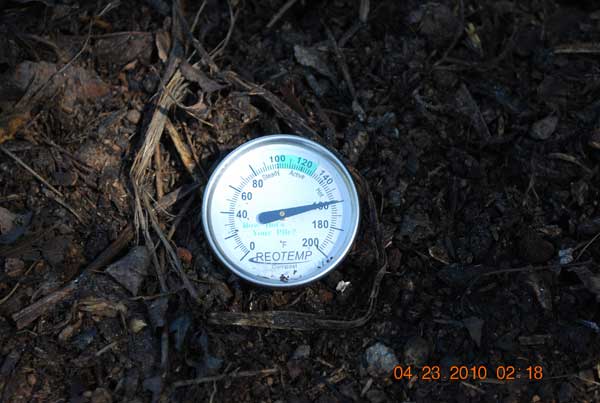
Compost thermometers have a 20” (51 cm) stainless steel probe that allows you to read the temperature at the center of the pile. When the core temperature climbs over 155° (68° C), oxygen will be depleted within a few hours, so it’s time to turn the pile.
Turning a Hot Compost Pile
Turning the pile opens and aerates the core before all the oxygen is depleted. It also allows you to adjust the moisture level of the compost, adding water to dry areas, or mixing saturated layers with dryer materials.
In a hot compost pile, half the mass will eventually off-gas as carbon dioxide and water vapor. Moisture cooks out of the pile around the hot core, and may have to be replenished when you turn the pile.
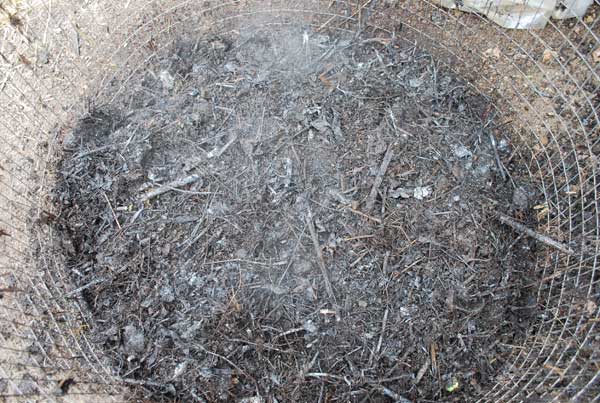
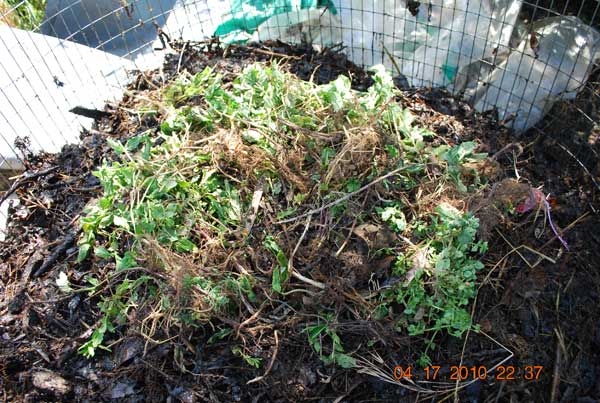
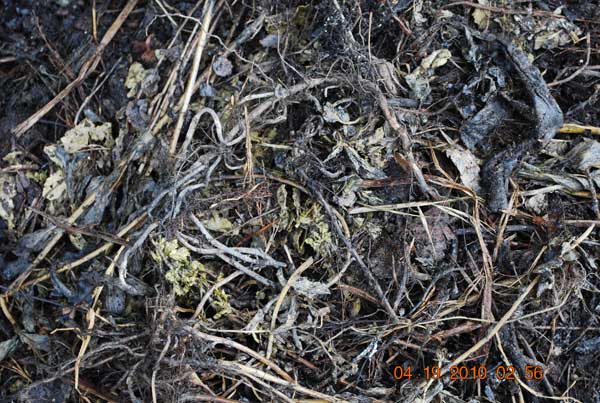
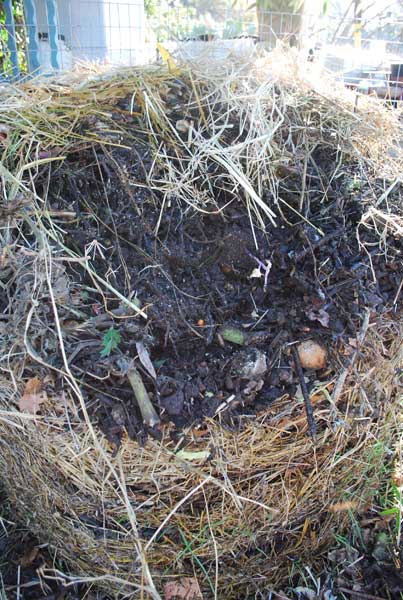
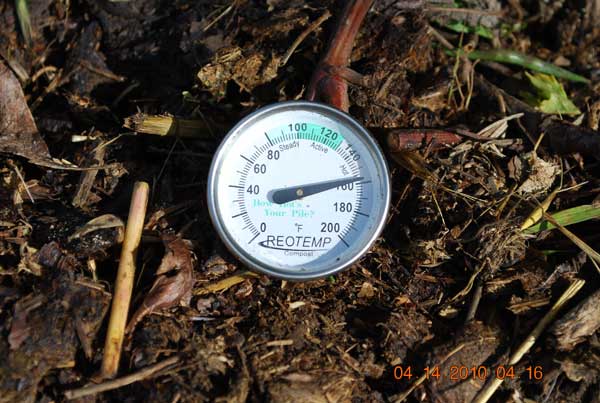
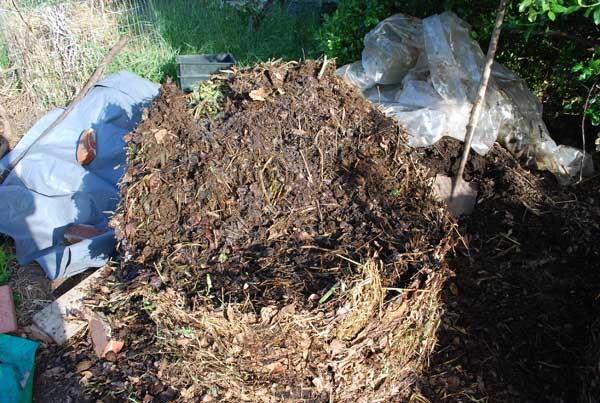
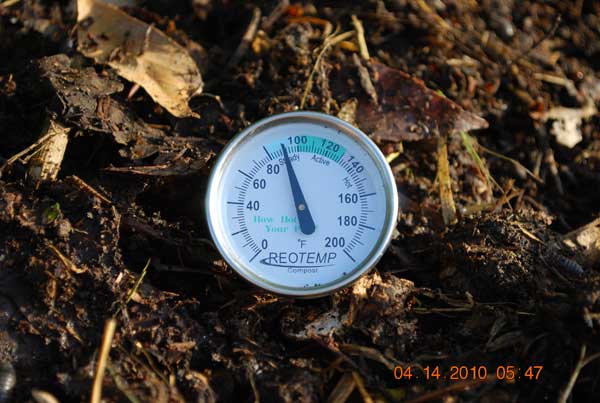
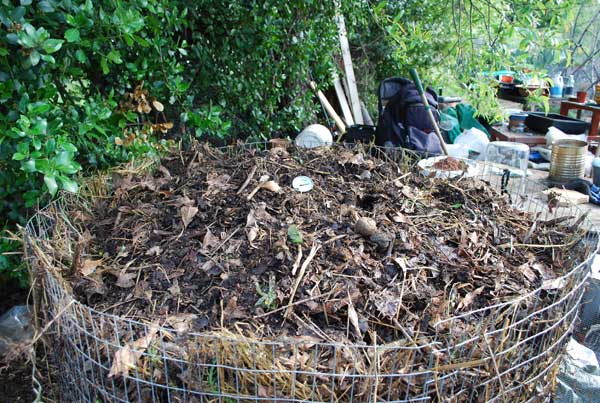
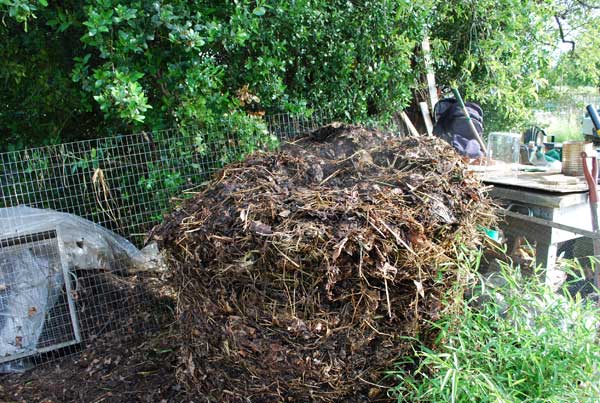
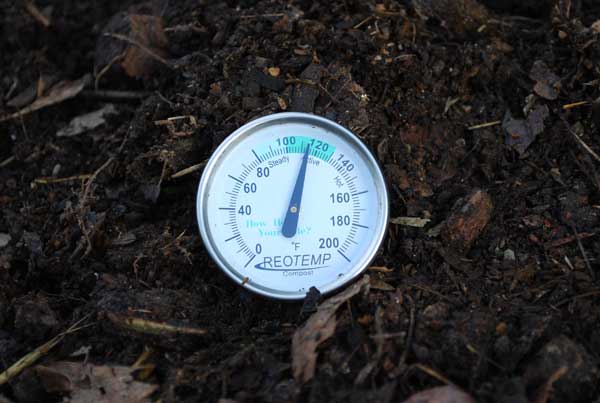
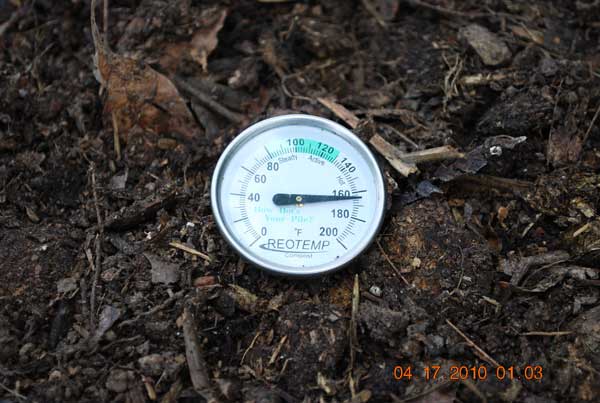
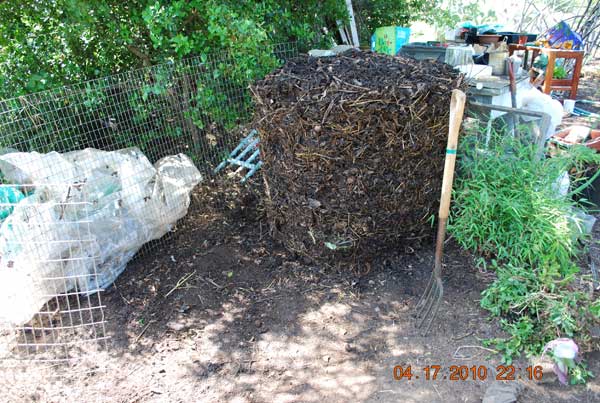
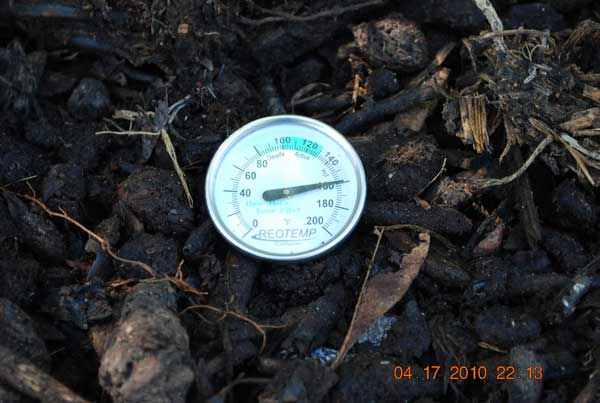
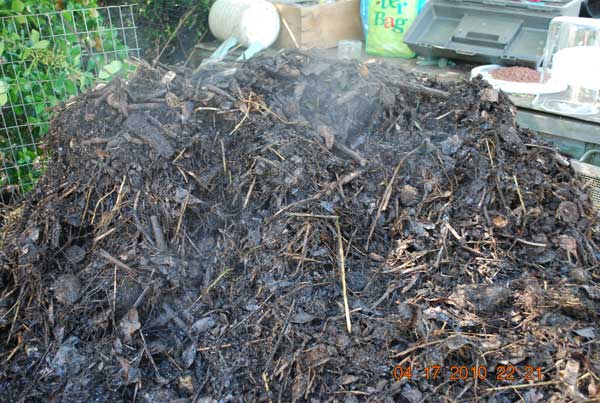
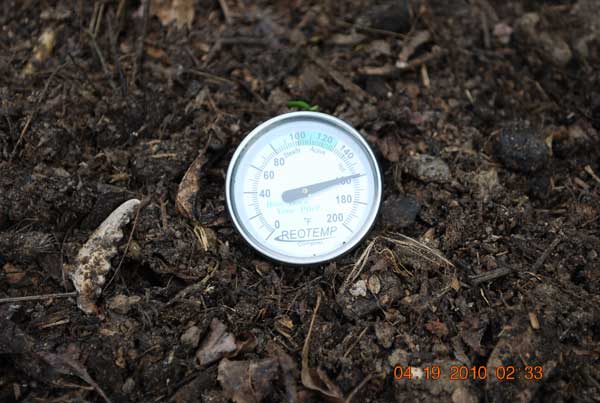
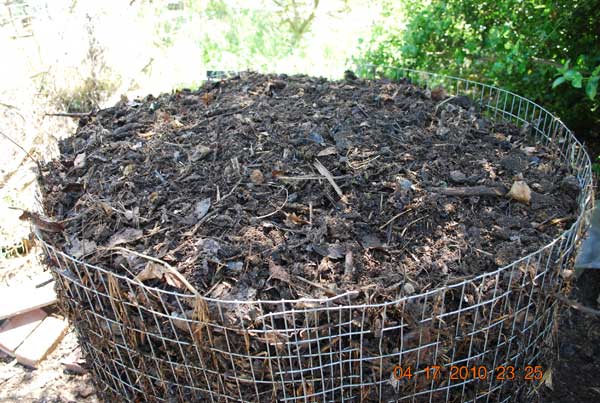
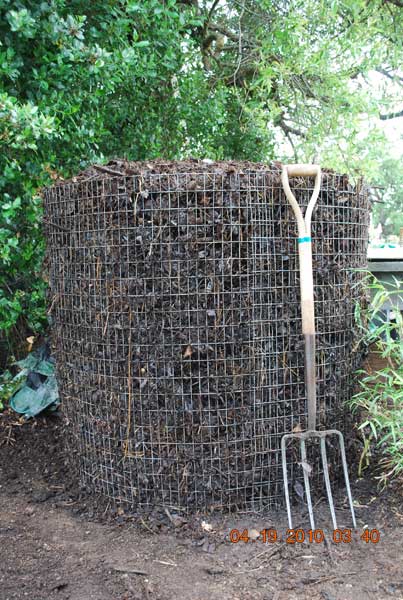
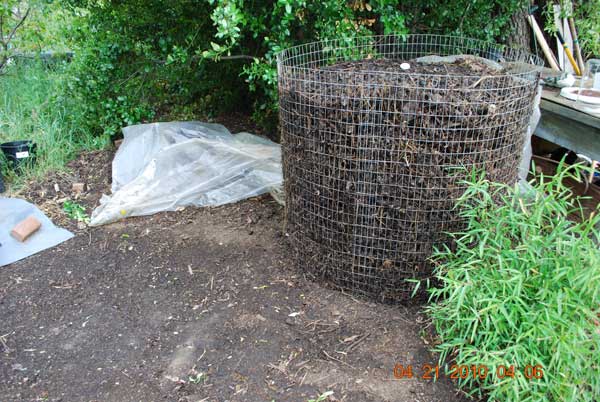
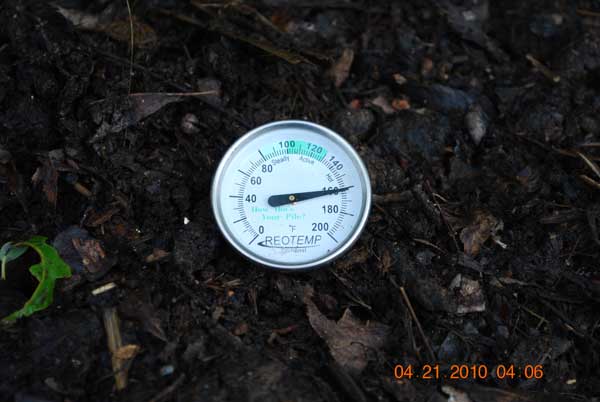
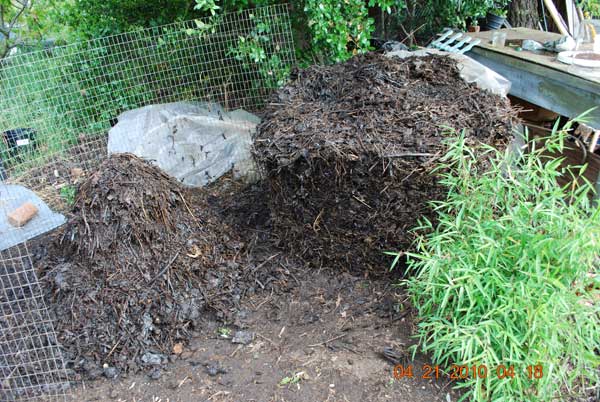
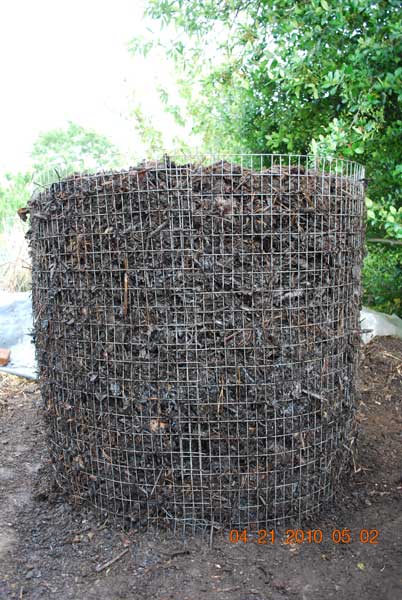
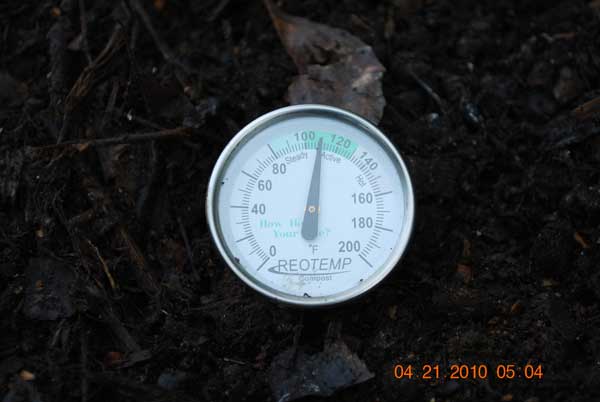
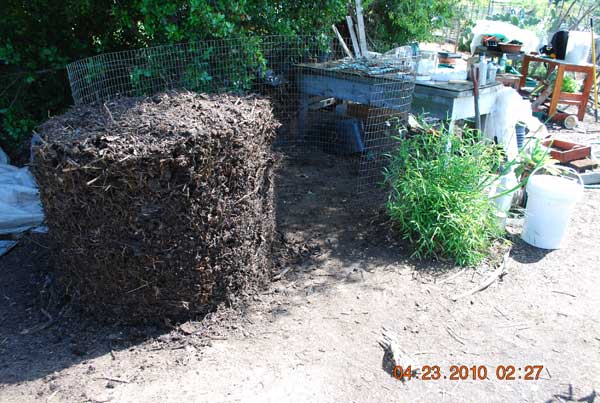
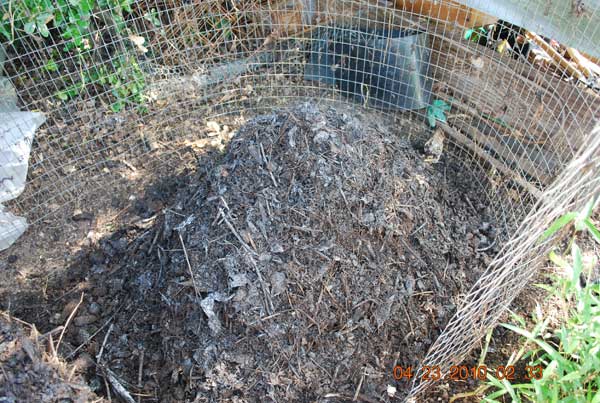
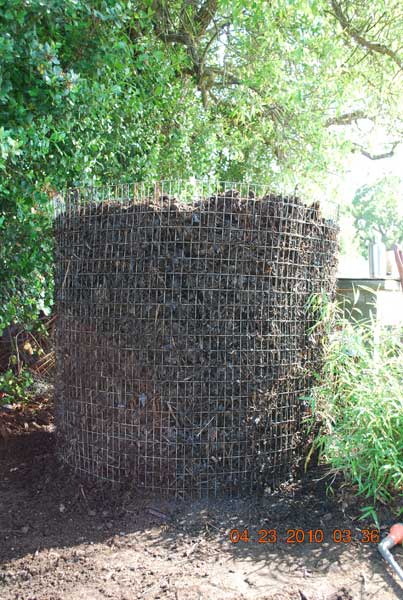
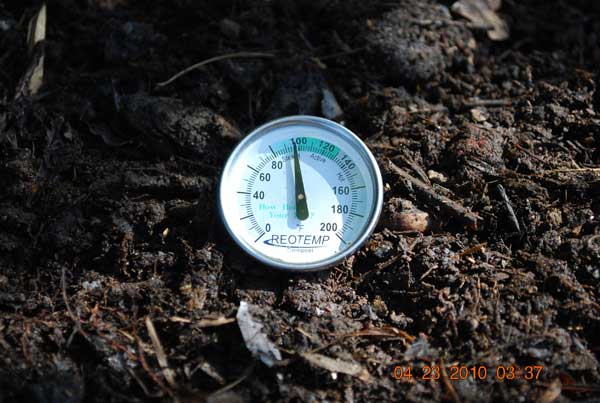
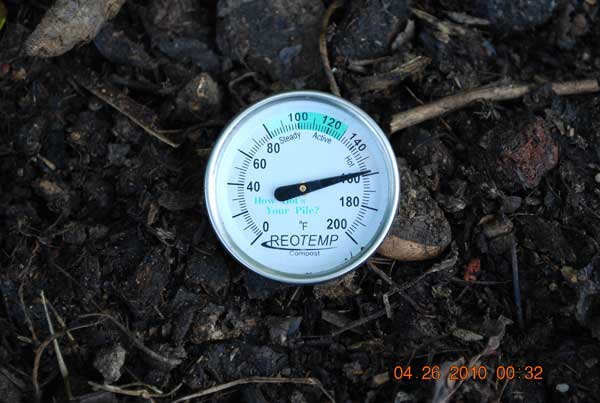
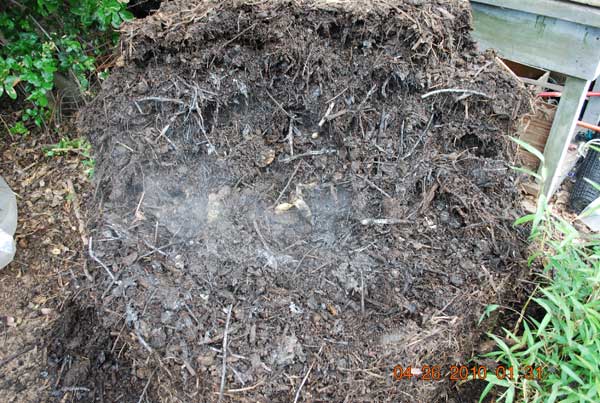
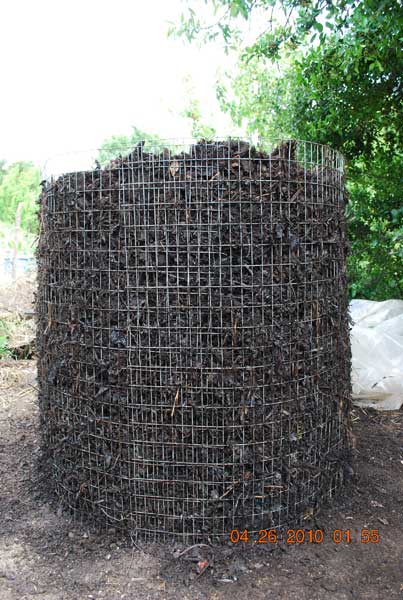
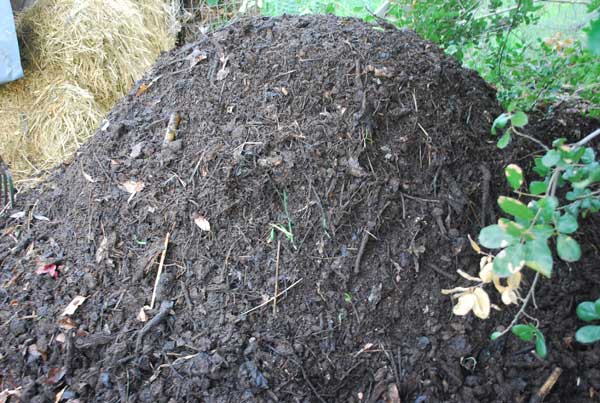
The photo table below shows changes that occur when hot composting. Each row shows the pile before turning, the temperature before turning, a cross-section of the pile during turning (note the changes in color and texture), the pile after turning, and the temperature after turning the pile.
Click any photo to enlarge.
| Pile Before Turning | Temp Before Turning | Pile Cross-Section | Pile End | Temp End |
|---|---|---|---|---|
| Compost Pile 2010-1 (built 04-13-10) |
|
|||
|
|
|
|
|
|
|
|
 |
|
| |
|
(No Photo) | 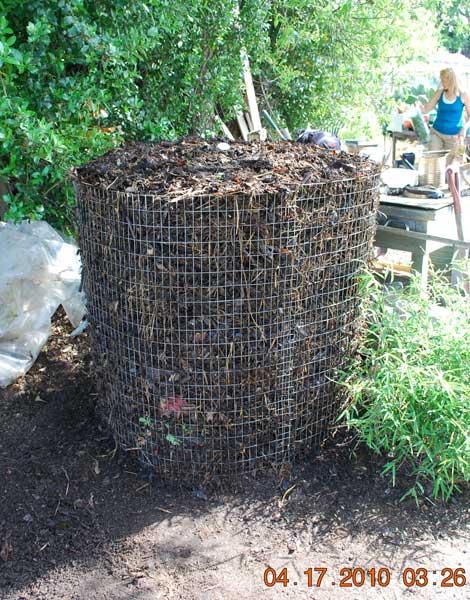 |
(No Photo) |
|
 |
|
|

|
|
|
|
|

|
|
|
|
|
|
|
|
|
|
|
|
|
|
|
|
| Compost Pile 2010-1 (Curing) |
|
| Date | Time | Temp Start | Action | Temp End |
|---|---|---|---|---|
| 04-14-10 | 4:16pm | 158° (70°C) | Turned pile for 1st time. | 91° (33°C) |
| 04-15-10 | 3:44pm | 159° (71°C) | Turned pile for 2nd time. | 114° (46°C) |
| 04-17-10 | 1:03pm | 164° (73°C) | Missed yesterday, but caught it before the pile went anaerobic. Turned pile for 3rd time. | 120° (49°C) |
| 04-18-10 | 10:13am | 160° (71°C) | Turned pile 4th time. | 115° (46°C) |
| 04-19-10 | 2:33pm | 160° (71°C) | Turned pile 5th time. White fungi attacking woody materials. | 120° (49°C) |
| 04-21-10 | 4:06pm | 162° (72°C) | Missed another day, but caught it before the pile went anaerobic. Turned pile 6th time. Turned it in stages, watered layers & let them cool to drop the pile temperature. | 109° (43°C) |
| 04-22-10 | 1:57pm | 140° (60°C) | Pile heating more slowly, no need to turn. | |
| 04-23-10 | 2:18pm | 160° (71°C) | Turned plle 7th time. | 98° (37°C)< |
| 04-24-10 | 11:44am | 142° (61°C) | Pile heating more slowly, no need to turn. | |
| 04-26-10 | 12:32pm | 158° (70°C) | Turned pile 8th time. | 102° (39°C) |
| 04-29-10 | 152° (67°C) | Temperature over 150° (66°C), but holding, not climbing. No need to turn. | ||
| 04-30-10 | 145° (63°C) | Pile cooling, no need to turn. | ||
| 05-16-10 | 80° (27°C) | Turned pile out for the 9th and last time, to cure. |
For information on curing compost after the hot phase is over, click Here.
Top of Page
|
Time & Effort
|
Composting Equipment
Processing Materials
|
Building a Thermal Compost Pile
Monitoring and Turning the Pile
How to Compost
|
Composting Basics
|
Compost Ingredients
Build a Compost Pile
|
Worm Composting


Copyright © 2009-2020, by Steve Masley, Grow-it-Organically.com
All rights reserved
![]()
HOME | About Us | Contact Us | Privacy
New! Comments
Have a question or comment about what you just read? Leave me a comment in the box below.